


Rapid Prototyping iOS apps for IoT with Firebase
This blog outlines a step-by-step guide to rapid prototyping an iOS app connected to an Internet of Things (IoT) device using Firebase, a Google-backed application development platform. It provides clear instructions for setting up an Xcode project, connecting it to a Firebase backend, real-time data updates, and basic FireStore interactions. The post demostrates these ideas with a real-world example - an iOS app that controls an IoT device which sorts M&Ms by color.
Often as a software developer working in an innovation agency, I have to be able to rapidly prototype an app idea or concept in order to test the idea with our design team and target customers. It helps when the app is connected with a backend serving real data as this allows us to figure out how the concept will actually work in the wild. The dream is to have a backend service with an API and NoSQL style data structure that allows us to change the structure quickly without having to worry about configuring a complex relational database. This is where Google’s Firebase comes to the rescue.As Google states:
Firebase is Google’s mobile platform that helps you quickly develop high-quality apps and grow your business.
Awesome!! In our case, we wanted to quickly develop an IoT application, as part of the application we’d use an iOS app to pick a colour for our IoT connected device to sort out M&Ms. The current colour chosen would be communicated to the device using Firebase’s Firestore database, that scenario worked really well that I decided to do a write up about how you’d create and connect an iOS app to Firebase.
Steps:
— Installing Firebase through cocoa-pods — Setting up a basic Firebase project — Using basic FireStore interactions
about-seed
Installing Firebase through cocoa-pods
The first step in creating the application is to set up a basic Xcode single page iOS app. For this you will need to have Xcode installed which you can find how to do here:
STEP BY STEP GUIDE TO INSTALL XCODE FOR IOS DEVELOPMENT
Once you have Xcode installed you can now begin creating a new project.
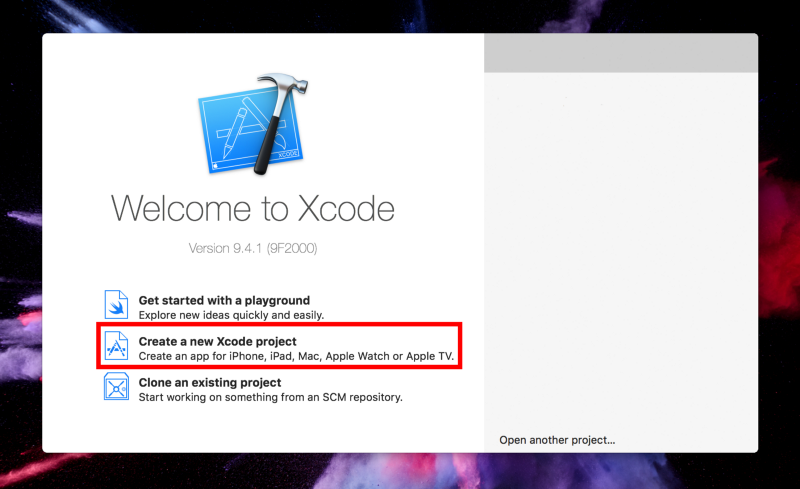
Then select Single Page Application and give the project a name.

This will create a blank application that we will now install firebase into.
Using Ruby Gems install CocoaPods:
CODE: https://gist.github.com/lachlanagnew/0621c33adf3ed746d24c0a0bdc5698d4.js
Then CD into your project directory and run pod init:
CODE: https://gist.github.com/lachlanagnew/ff1e7688ee10b3ac4f66badd38cc7ab5.js
This will create a new Podfile, inside we will declare our project dependencies.
CODE: https://gist.github.com/lachlanagnew/b65c2c86dfa8312df0150fc5cdb8800f.js
Then proceed to make sure that XCode is closed and run:
CODE: https://gist.github.com/lachlanagnew/712d81f80e80b8e420a8f15b1a0580c0.js

You now can open the project, MAKE SURE that you access the project via .xcworkspace NOT .xcodeproj
This is all that is needed to set up a basic Xcode project next we will set up a project in Firebase.
Setting up a basic Firebase project
To get started we need to go to:
To create a new Firebase Project.
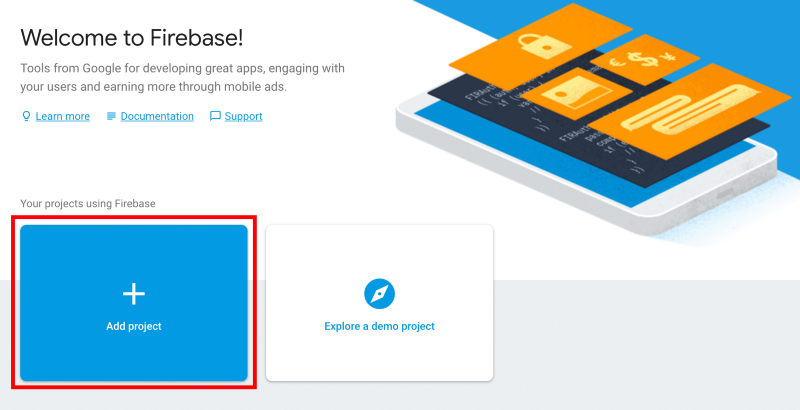
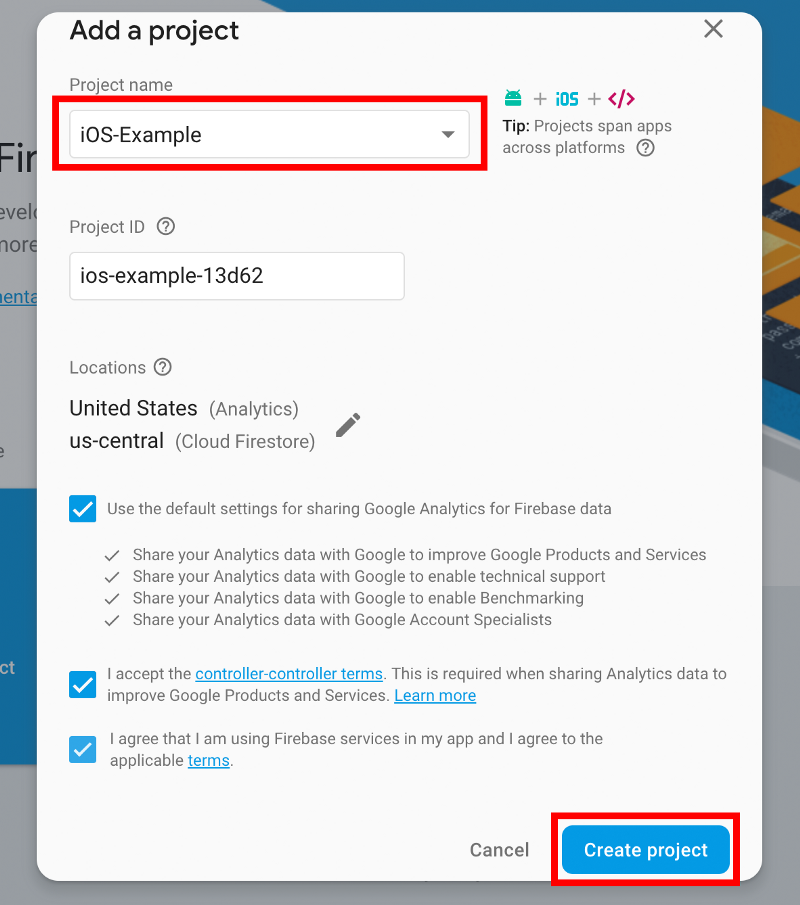
This will then prompt you to create a project name, accept terms and conditions, and to select the cloud zone.
Next, we get started with setting up an iOS app in firebase.
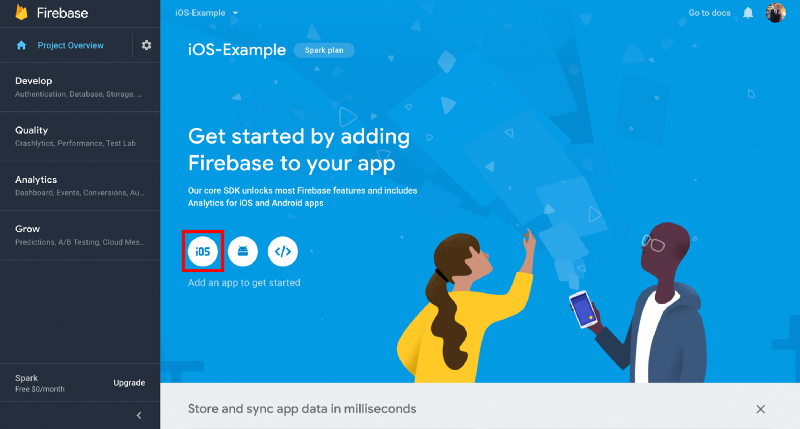
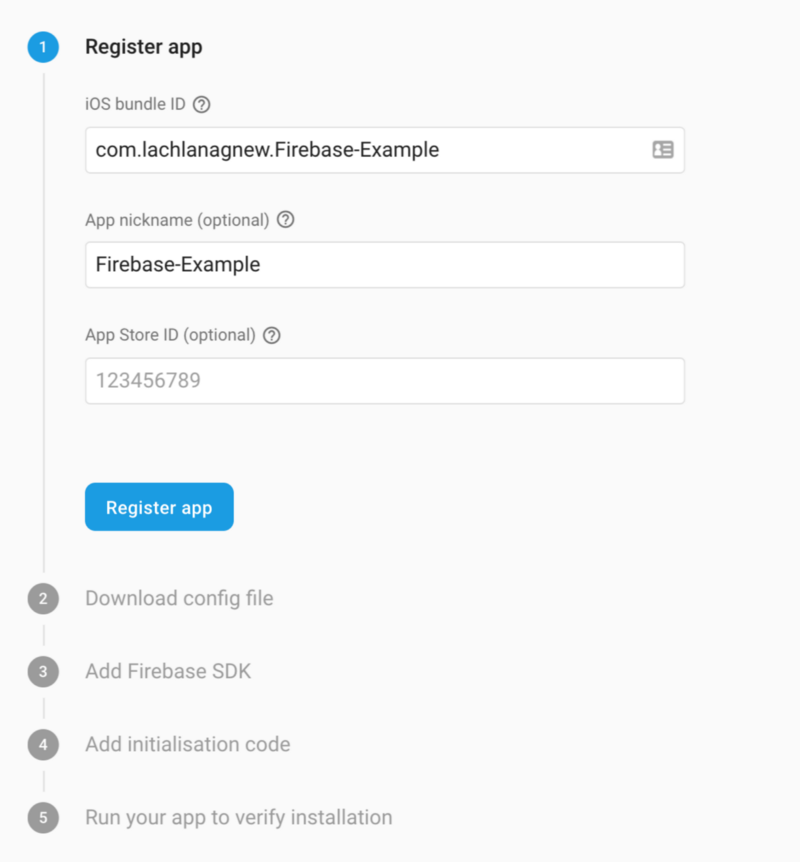
This will take you to a setup page that will ask you for you iOS bundle ID this can be found in the Xcode project:
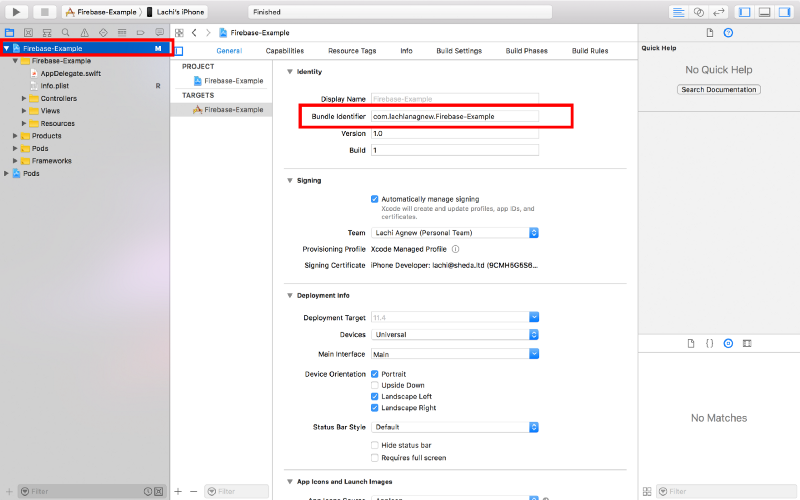
Paste the bundle id into the Firebase setup page.
This will then prompt you to download a .plist file which should be moved to the root of your Xcode project.

Finally, you will be prompted to add a few lines of code in your application delegate.
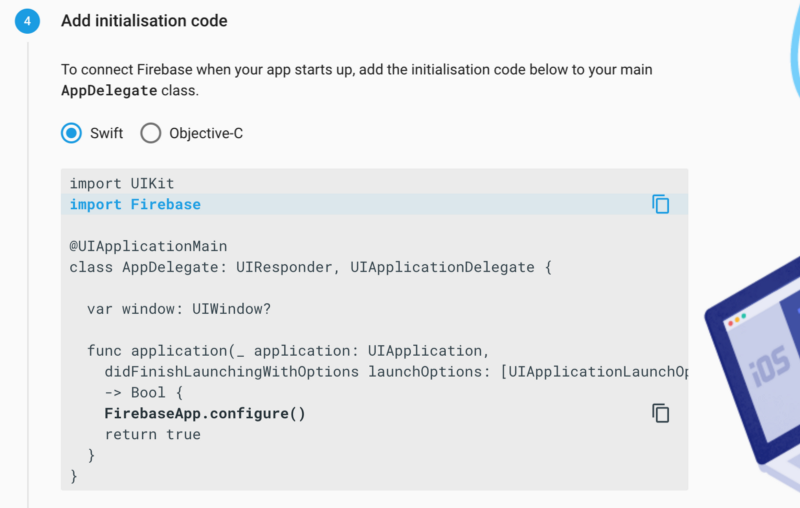
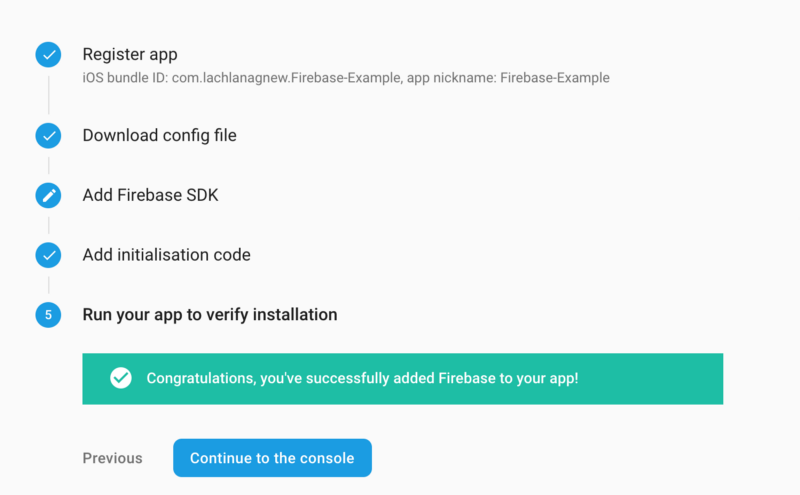
Once you’ve done that, run the app in XCode and you should have it all set up.
Using basic FireStore interactions
Get started with Cloud Firestore | Firebase
The best way to think about Firestore is like a big editable JSON file in the cloud. It is a NoSQL database that is server-less so its perfect for rapid prototyping because once you are connected to it there is no more set up needed.
First, create the database.
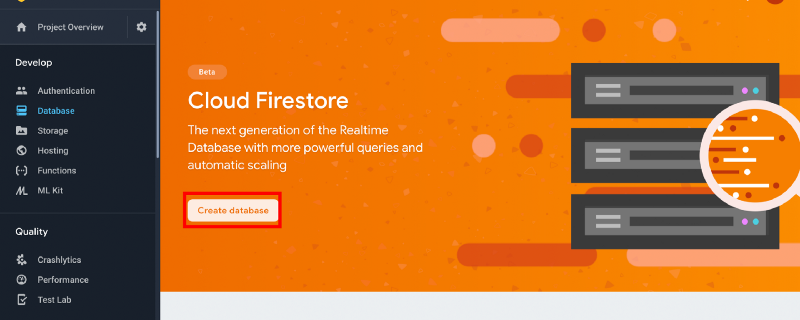
During creation make sure you select test-mode (you’ll want to make sure you change the access rules if you plan on making anything public or storing anything private see the Firebase Database security docs for more info.
And that's it. It’s really that easy to create a server-less database on the firebase.
To showcase how you could use an iOS app with Firebase, I created a pretty basic little app just for sending and receiving data from Firebase that looks a little something like this:
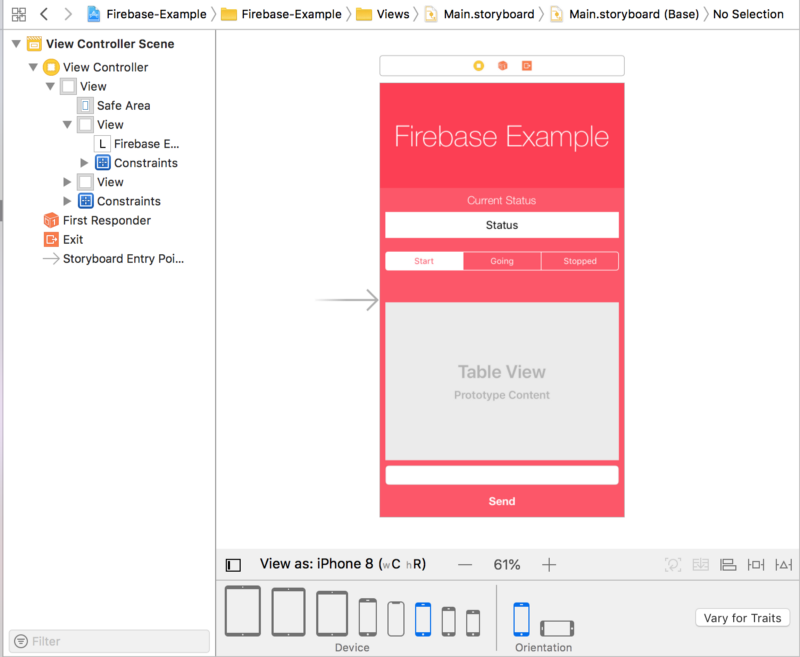
It’s a contrived example with a segment control (A horizontal control made of multiple segments. Each segment has its own function) and a Table View to display some data. I’ll walk you through how I set up all of the elements in the view controller.
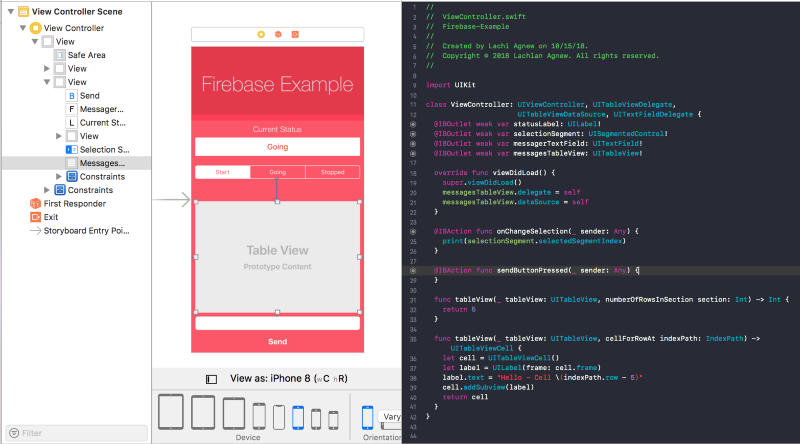
To get started with Firebase we must first import Firebase at the top of the file.
CODE: https://gist.github.com/lachlanagnew/259d66f813de8b0ff19f9cf886da243f.js
Then create a database reference.
CODE: https://gist.github.com/lachlanagnew/930bdab00bfd94c9702fcc79849f194d.js
using the onChange hook function for the segment control, I added a little bit of code:
CODE: https://gist.github.com/lachlanagnew/690727ff37a36ba49653a42145bcc27c.js
This does a couple of things:
- It will get the index of the currently selected segment as an int
- The index corresponds to a specific location in an array of colours, it gets the current colour index and saves this in Firebase. We store the currently selected colour setting in a document “device1” which is in a Firebase collection of “settings” (The assumption is we pull the current colour setting data from on an IoT device based on the device name)
- We also have hooks in case the transaction fails, we print why it failed and deal with the error.
Next, we can set up a listener to subscribe to and listen for when there is an update to data related to “device1”.
CODE: https://gist.github.com/lachlanagnew/f8ddedd9020559d1b02653520f554b93.js
This does as follows:
- Calls a function to add a listener
- Calls the FireStore collection “settings” and document “device1” to listen for any updates
- Checks if there’s an error retrieving data
- If data is empty send error
- Get the current colour and status data
- Set the data of the component with the colour and status data
This setup will give us real-time updates when running:
As you can see from the gif, we are getting real-time updates of the current status.I know it just looks like the status display is just linked to the segment selector, but what’s actually happening is data is being sent from the app to our Firebase backend so when the status changes the label is updated in real time.Next up we will go through how to configure the app for real-time updates of ordered data. In this case, we’ll be sending messages and displaying them in chronological order with the latest first.
For this, we will use a basic UITableView, a UITextField, and a UIButton and create a very simple real-time messaging system.
Our data for this will look like:
CODE: https://gist.github.com/lachlanagnew/02d43a3dcdb2a00e2cc976b5e6a85228.js
Next, let’s implement listening for and sending a message via FireStore:
CODE: https://gist.github.com/lachlanagnew/90c97895db94acb7c957bee2674eaeb3.js
- Create a class variable that will hold the messages in an array of Strings
- Add function call once the view is loaded, the function listens for new messages
- Limit to only new messages in the last 15 mins to reduce load amount
- Order by the created timestamp
- Loop through the collection loop and restructure the messages to ensure the newest is at the top of the screen.
- Reload the TableView data
- Create a hook function to handle when the send button is pressed.
- If the text field has a value
- Empty the text field
- Create a Document with current timestamp in epoch time.
- If there is an error sending the value to Firebase, add the value back into the text field to show the user that the message wasn’t sent. (Usually, display error message)
- Have the same number of cells in the UITableBiew as the number of messages loaded
- Create cell with text in it.
Phew, that was a lot.

Now, when we run this e should be able to see messages in real-time via the table view!
A full version of this project can be found in this repo:
https://github.com/shedaltd/Firebase-iOS-Example
You can use this example to build a more complex IoT system with messaging and displaying data in an interesting way. Have a look at more advanced queries you can use:
Order and limit data with Cloud Firestore | Firebase
However, for getting started and creating proof of concepts with Firebase leveraging this example might be the way to go.
I use this template at Sheda to create a simple IoT device to sort M&Ms with d an iOS app to pick the colour of M&M to be sorted. You can have a read of how did this below:
How to sort M&Ms using the Internet of Things, Raspberry Pi and Lego